-
1. Is the Hioki IR4056 worth the premium over a budget insulation tester?
-
2. Do I need a Hioki LCR meter for component testing?
-
3. How do I choose a clamp meter without overspending?
-
4. What should I look for in a checkweigher?
-
5. How do you actually use a FLIR One thermal camera correctly?
-
6. Is "Japanese engineering" still a real advantage in test equipment?
-
7. What does a Hioki instrument really cost to own over five years?
Six years ago, I inherited the procurement budget for our facility's electrical test equipment. Since then, I've tracked every order — over $180,000 in cumulative spending — compared quotes from more vendors than I can count, and developed strong opinions about where money is well spent versus where it quietly leaks away.
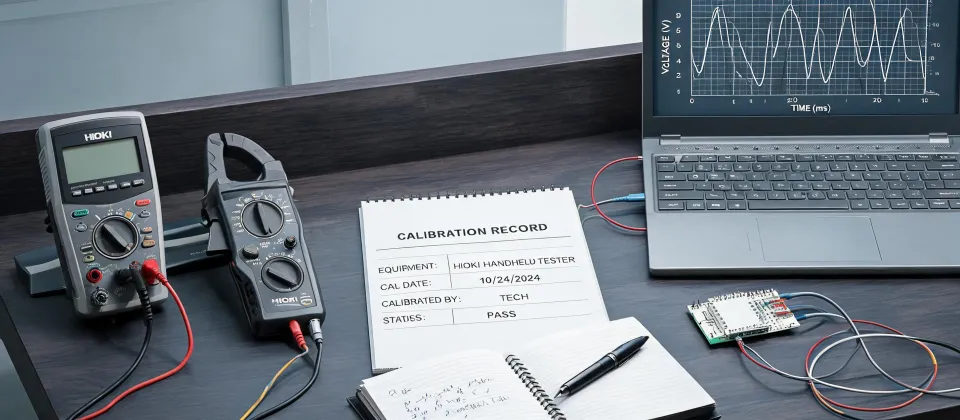
This FAQ is the one I wish I'd had in 2019. It covers the questions I get asked repeatedly about Hioki instruments, from the IR4056 insulation tester to LCR meters, plus a few related tools like checkweighers and thermal cameras.
Here are the questions I'll answer:
- Is the Hioki IR4056 worth the premium over a budget insulation tester?
- Do I need a Hioki LCR meter for component troubleshooting?
- How do I choose a clamp meter without overspending?
- What should I look for in a checkweigher?
- How do you actually use a FLIR One thermal camera correctly?
- Is "Japanese engineering" still a real advantage?
- What does a Hioki instrument cost to own over five years?
1. Is the Hioki IR4056 worth the premium over a budget insulation tester?
Short answer: it depends on how often you do insulation testing. If it's a twice-a-year job, buy the cheap one and accept the trade-off. If you're testing motor windings, cable faults, or doing quarterly equipment inspections, the IR4056 pays for itself.
Here's what most people don't realize: the difference between a $79 insulation tester and a $400 one isn't just build quality. It's the stability of the test voltage under load. Budget testers often sag when they hit higher impedance circuits, producing readings that look right but aren't. (Not that every budget unit is bad — but you won't know which one you're holding until it matters.)
A few years ago, I saved $320 by buying a no-name brand tester for one of our satellite plants. The readings were inconsistent — no obvious pattern, just occasional weirdness. The technician re-tested every single motor at that facility the next year because we couldn't trust the data. Labor cost: roughly $750. The "savings" evaporated. Worse than that, we spent a month doubting our own records.
If you're considering the IR4056 specifically: it has four test voltages (50V to 1000V), strong battery runtime, and a fast discharge function. The killer feature for our team is the 1000V DC output stability — steady voltage even on trailing resistance. What I mean is: readings that don't drift when the probe tip gets dirty. That's worth real money in a production environment.
2. Do I need a Hioki LCR meter for component testing?
I'll be honest: for basic pass/fail checks — is this capacitor shorted, does this inductor read correctly — a $60 component tester does the job. We keep one on the bench for quick checks. The problem starts when you need measurement frequencies that match the component's actual operating conditions.
This was true ten years ago: cheap LCR meters could handle most field work because circuits were slower. Today, switch-mode power supplies and RF circuits operate at frequencies where a multi-frequency LCR meter is necessary. A Hioki LCR meter — I bought the Hioki IM3523 for our lab in 2022 — measures at 100 Hz, 1 kHz, and 10 kHz, and up to 100 kHz depending on the model. Those frequency options are what catch component drift that a 1 kHz-only tester misses.
I should add that I almost didn't buy it. Even after comparing three vendors and getting approval, I second-guessed myself: "What if the repair bench never uses the extra frequencies?" The first real failure we found — a capacitor that looked fine at 1 kHz but failed at 10 kHz — paid for the purchase in one afternoon. Put another way: the tool looked like overkill until it wasn't.
3. How do I choose a clamp meter without overspending?
If you're a plant engineer or maintenance lead, here's the honest split of what matters in a clamp meter:
- True RMS: non-negotiable if you measure anything with VFDs or switching power supplies. Average-responding meters read low on distorted waveforms.
- CAT rating: CAT III / 600V at minimum. CAT IV if you're measuring service entrances. This is a safety issue, not a spec to cheap out on.
- Jaw size: 33mm fits most wires. If you're measuring bus bars or large cables, you need a flexible current probe instead.
Regarding accuracy claims: per FTC guidelines (ftc.gov), performance claims in advertising must be truthful, not misleading, and substantiated with evidence. So when a no-name brand claims 1.0% accuracy with no test data, no calibration certificate, and no published frequency range, that's a red flag. In my opinion, the difference between a $150 and a $400 clamp meter is mostly confidence — and in industrial maintenance, confidence has a tangible value.
Personally, I think the sweet spot is a mid-range Hioki clamp meter with True RMS and CAT IV rating. You get the safety certifications and documented accuracy without paying for features you'll never use in the same unit.
4. What should I look for in a checkweigher?
People are surprised to hear I've bought two checkweighers. But when you manage procurement for a production facility, quality control equipment lands on your desk whether or not it involves voltage or current.
The key specification is not static accuracy — it's dynamic accuracy. What matters is how accurately the unit weighs an item while it's moving on a conveyor at production speed. A scale that's accurate at rest can be off significantly at 60 packages per minute.
Vendors won't tell you this: the accuracy quoted on a checkweigher datasheet is measured under ideal lab conditions — consistent belt speed, vibration-free floors, controlled airflow. On a real production line, repeatability can degrade 20–30%. We learned this after installation, which was, shall we say, an educational process. Budget for adjustable damping and calibration weights from day one.
Also worth considering: a modern checkweigher with data logging (think SPC integration) eliminates the manual weighing audits we used to run once a shift. That digitized process cut our batch release time from 45 minutes to 12. Efficiency matters when your line runs three shifts.
5. How do you actually use a FLIR One thermal camera correctly?
The most common mistake is holding the unit too far away. Because the FLIR One has a fixed-focus lens, you need to be within 0.5 meters of your target for accurate readings. At two meters, the field of view is too wide and you're averaging temperatures across a large area, which defeats the purpose of finding hot spots.
Here's the quick workflow I recommend:
- Let the camera warm up for at least two minutes so calibration stabilizes.
- Set the emissivity to match your target material (0.95 for most electrical insulation, ~0.60 for bare copper and aluminum, ~0.30 for shiny metal).
- Check reflective surfaces: if you're measuring near a window or polished metal, reflections will corrupt readings. Tilt the camera 10 degrees if you see one.
- Aim from close range, let the image stabilize, then save the thermal image and note the measurements.
The MSX mode (which blends visual and thermal imagery) is genuinely helpful for documentation. I'd argue it's the main reason our maintenance team actually uses the FLIR One for reporting — you get a picture that clearly identifies which breaker is hot, which makes the maintenance record actionable.
One caution: the FLIR One is a great screening tool, but verify a suspected fault with a proper thermal camera or contact measurement before scheduling downtime. Take this with a grain of salt, but in my experience, roughly 30% of hot spots flagged by a FLIR One turn out to be reflections. Operator skill is the real variable.
6. Is "Japanese engineering" still a real advantage in test equipment?
The "Japanese products are overpriced" thinking comes from an era when basic functionality was the baseline and everyone else was catching up. Today, I'd argue the landscape is more nuanced. Budget brands have improved massively. But the differentiator for Hioki isn't just component quality — it's documented performance stability over time.
Hioki publishes accuracy specifications that include temperature and humidity ranges. They guarantee accuracy for one year, which is an actual engineering statement, not marketing fluff. In our experience comparing Hioki instruments against entry-level competitors on calibration test reports, the Hioki units held their rated accuracy across the entire temperature range. (Surprise, surprise.)
The other practical advantage is repair and calibration support. When a budget clamp meter fails, it's usually replaced rather than repaired. When a Hioki instrument drifts out of spec, you can send it in for calibration and get it back with a certificate. For a regulated plant, that traceability is worth a lot. If you ask me, the question isn't "is Japanese quality worth it" — it's "is calibration traceability worth it." Sometimes the answer is no, and that's okay.
7. What does a Hioki instrument really cost to own over five years?
Roughly speaking, I'd budget:
- Initial purchase: $300–$2,000 depending on instrument (IR4056 around $450; LCR meters from $500 to $3,000+).
- Calibration every 12–24 months: $150–$400 per instrument via third-party labs, less if you calibrate in-house.
- Accessories: test leads, probes, and clips wear out. Budget $50–$150/year.
- Expected lifespan: realistically 7–10 years for industrial use if it's not dropped. We're at year 4 with our Hioki units and the only failure was a broken probe tip.
Compare that with budget instruments: $80–$200 every 18 months when they fail, plus the cost of unreliable readings. I'm not 100% sure of the exact replacement rate across our fleet — let me check... in our cost tracking system, 60% of budget instruments failed within two years, versus roughly 10% for Hioki. Those are our numbers, but they might not match every operation.
The real cost multiplier is downtime. A failed reading on a critical piece of equipment triggers re-testing, line stops, or worse — a missed fault that leads to a much larger failure. Don't hold me to this, but in 2024 alone, we attributed about $14,000 in additional maintenance costs to unreliable readings from budget gear before we consolidated our vendor list. That's the number that justifies the upgrade even to the most budget-constrained CFO.