-
Step 1: Verify the Failure Before You Blame the Instrument
-
Step 2: Look at What You Already Own Before Buying Anything
- Step 3: Test the Load Cell Itself
-
Step 4: Check the Safety Rating Before You Measure Anything Live
-
Step 5: Decide Whether to Rent or Buy—With the Right Math
-
Step 6: Source From a Channel That Can Actually Deliver
-
Step 7: Verify Your New Tool Before You Trust It
-
Three Mistakes That Will Bite You in a Hurry
-
The Bottom Line
Let me guess why you're here. A production line is down. Or a calibration deadline is staring at you. Or the load cell you just installed is giving readings that make no sense. And the only option you've been offered involves a three-week lead time and a repair ticket.
I've spent eight years coordinating test equipment for industrial maintenance teams, and I've processed over 200 rush orders in that time. Somewhere around order 50, I stopped panicking. You develop a rhythm. This checklist is that rhythm, written down.
It's seven steps. The goal isn't to find you a perfect long-term solution—it's to get you a correct answer in the next few hours. Let's go.
Step 1: Verify the Failure Before You Blame the Instrument
The first time I saw a “failed” load cell turn out to be a loose connector pin, I felt like an idiot. The second time, I felt annoyed. By the fifth time, I made a rule: nobody touches the replacement budget until the wiring is verified.
On a typical Rice Lake load cell, start at the junction box. Check:
- Are all connections seated? Push and pull gently on each pin. Loose pins are the number one cause of “phantom” load cell failures.
- Is the cable shield intact? A nicked cable underneath a clamp can cause intermittent dropouts that come and go with vibration.
- Is excitation voltage present at the cell? Most indicators supply 5V or 10V DC. Measure right at the cell if you can reach it.
That last check requires a decent multimeter. I'll also confess something: I've seen brand-new load cells fail on delivery, and I've seen “broken” cells work perfectly once the junction box was re-terminated. Test first. Swap second.
Step 2: Look at What You Already Own Before Buying Anything
It's tempting to order new equipment the moment something gets weird. Don't. Dig through the cabinet first. You probably have tools that answer a lot of questions if you think about them:
- A digital multimeter — any decent brand, ideally one that measures millivolts with real resolution, for bridge checks and excitation.
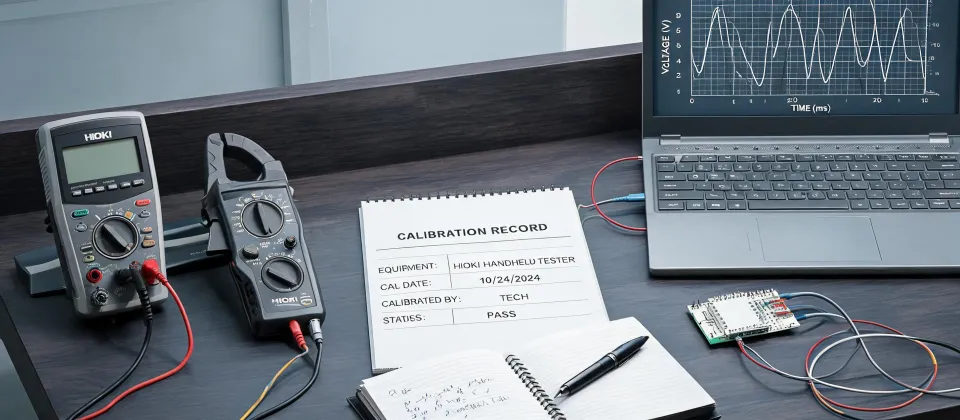
- A clamp meter — for verifying live current without breaking the circuit. If you do electrical work regularly and don't own one, a clamp meter Hioki sells is a no-brainer to keep around.
- An oscilloscope — not every shop has one, but if you're chasing an intermittent signal, seeing the actual waveform tells you more in five minutes than an hour of guesswork.
Now, a boundary: this assumes you're doing bread-and-butter industrial troubleshooting. If you're in a regulated laboratory with contract traceability requirements and an audit next week, then your procedure probably already dictates where equipment comes from and how it's calibrated. That's a different situation, and this checklist isn't meant to override it. For shop-floor chaos, though, the list above is usually enough.
Step 3: Test the Load Cell Itself
If the wiring checks out and the indicator side is fine, the load cell is the suspect. Two measurements catch most failures. This is the part you probably searched for—here's how to test a rice lake load cell without waiting for a service call.
3a. Bridge resistance
Most Rice Lake load cells use a 350-ohm Wheatstone bridge. Check the nameplate—it's printed on the cell and usually reads “350Ω” or “120Ω.” Set your multimeter to ohms and take two readings:
- Input resistance — between the positive and negative excitation wires (usually green and black, but verify against the wiring diagram on the cable).
- Output resistance — between the signal wires (usually white, red, or blue).
Expected: readings within about ±1% of rated value. Bad news: an open circuit, a dead short, or a reading that drifts while the meter sits still. Any of those points to a failed cell or a damaged cable—and either way, it's replacement time.
3b. Insulation resistance
Moisture is another classic load cell killer. It gets inside the housing, and the readings start jumping around erratically. To test for this, you need an insulation tester with a low test voltage (50V or 100V is typical for load cell work—I use an insulation tester from Hioki, but any reputable brand works).
Measure between each bridge leg and the cable shielding or cell body. A common industry rule of thumb: anything above 5 gigaohms is fine; anything below 1 gigaohm is suspicious. One small hiccup: if your insulation tester maxes out at a few hundred megohms, a perfectly healthy cell can show “over-range” and mislead you. Compare the suspect cell side-by-side with a known-good cell to calibrate your expectations.
And if you can apply a known load: strain gauge load cells typically output 2 millivolts per volt of excitation at full scale. At 10V excitation, full scale is about 20mV. No output under load means either the bridge is dead or the indicator isn't supplying power.
Step 4: Check the Safety Rating Before You Measure Anything Live
If your fix involves measuring on a live electrical panel, your meter needs the right category rating. This isn't marketing fluff—it's defined in IEC 61010-1, the safety standard for electrical test equipment:
- CAT III — for distribution panels and fixed installations.
- CAT IV — for utility service entrances and overhead lines.
Use a lower-category meter in a higher-category environment and you risk arc flash. I'm not being dramatic; that's the standard's whole reason for existing. This is also where buying from a legit brand earns its keep. “Hioki test equipment” (or any established manufacturer) and their authorized distributors stock the real, certified product. The questionable $20 meter that arrives tomorrow from a marketplace with no CAT rating? It's a gamble with your safety—one that I've watched end in equipment damage and, in one case, a partial plant shutdown.
Step 5: Decide Whether to Rent or Buy—With the Right Math
Here's where the emergency-specialist side of my job kicks in.
In March 2023, a client's main load cell failed on a Tuesday. They were determined to save a few hundred dollars on a replacement from an unverified online seller instead of paying a known supplier's price. We warned them about the lead-time risk. They ordered anyway. Five days later, the “expedited” package still hadn't shipped, because the seller didn't actually stock it. The line stayed down for a week. The lost production cost them more than ten times the price difference.
(Which, honestly, stung to watch—we'd made the same exact mistake two years earlier with a rush order for an oscilloscope and a vendor who overpromised.)
The math we use now: if one day of downtime costs more than the expediting fee, the expediting fee is the cheapest thing you'll buy this week. In March 2024, a client called at 2 p.m. needing a clamp meter for the morning shift. We paid $95 in overnight freight on top of a $280 meter. That seemed expensive until we compared it to leaving 14 technicians idle at $40 an hour. You already know which number is bigger.
Step 6: Source From a Channel That Can Actually Deliver
The fastest way to get test equipment is to buy from someone who physically has it. Here's the order I use:
- Call a regional distributor or your regular rep. They'll tell you what's on the shelf today, not what they can order.
- Search authorized resellers' stock online. Searching “clamp meter hioki” or “hioki test equipment” gets you to legitimate product pages fast. Filter for “in stock.” That phrase means 3-day delivery at worst. “Ships in 2–3 weeks” means they don't have it either.
- Only then look at expedited shipping. Overnight freight on a multimeter runs $40–100; on an oscilloscope, $100–200. Compared to another day of troubleshooting, that's cheap.
A word on used equipment and marketplace deals: I've seen meters that looked right, felt right, and were internally damaged or counterfeit. Buying a used “bargain” that fails calibration at the worst possible moment isn't a saving; it's a liability. The calibration certificate and the warranty have a price, and that price is worth paying when the clock is ticking.
Step 7: Verify Your New Tool Before You Trust It
A brand-new instrument is not a verified instrument. Four quick checks before it goes into service:
- Check the calibration certificate — make sure it's in the box and matches the serial number on the unit.
- Measure a known source — a battery or reference voltage for voltage checks; a known resistor for ohms. (Use wall voltage as a rough check only if you're set up for safe measurement practice. If in doubt, stick to batteries.)
- Zero the clamp meter — a good clamp meter settles on zero when it's not clamped around anything. A few counts of drift means calibrate or replace.
- Tag it with the date and your initials — “Verified by [name], [date].” Future-you will be very grateful during the next emergency.
We didn't have a formal incoming verification process until 2021. It cost us when a rush-order multimeter arrived with a calibration date that was already three months out of tolerance, and nobody caught it until the measurements didn't match expected values. That's the day we wrote this step down. Learn from our invoice.
Three Mistakes That Will Bite You in a Hurry
1. Buying specs you don't need. If you're checking 24V DC signals and continuity, a handheld multimeter is plenty. If you're analyzing fast transients on power lines, then yes, an oscilloscope is the right call. But “the most expensive one” is not a technical reason. A ton of our rush orders are for basic tools, and the buyer over-specs because they're scared of being wrong. Don't be.
2. Ignoring calibration status. An instrument without a valid calibration certificate is just a box with a screen. In a production environment, that will absolutely come back to bite you during the next quality audit.
3. Trusting a verbal “in stock.” I learned this the hard way in 2023: three vendors told me a specific oscilloscope was on their shelf. Two actually shipped it. The third took the payment and then said they'd “get it from the manufacturer in 12 days.” (Surprise, surprise.) Call first. Ask for a serial number. Pay only once you've confirmed the physical unit exists.
The Bottom Line
When a deadline is breathing down your neck, the checklist isn't about being less nervous (well, maybe a little). It's about keeping you from doing something expensive and dumb—like replacing a $500 load cell when the real problem was a $1 connector, or buying an unrated meter from a marketplace because it promised overnight delivery.
Test the instrument before you replace it. Check the safety rating. Ask for real availability, not promises. And don't resent the rush fee when you have to pay one—it's buying certainty, and certainty is the scarcest resource in any emergency.
Oh, and if you're wondering whether this process works beyond load cells and electrical equipment: the same logic handled a lab's broken pipette holder last year. They had 48 hours before a validation run, we found a supplier with the right part on the shelf, paid the overnight freight, and they made the deadline. Same structure, different box. The approach scales.